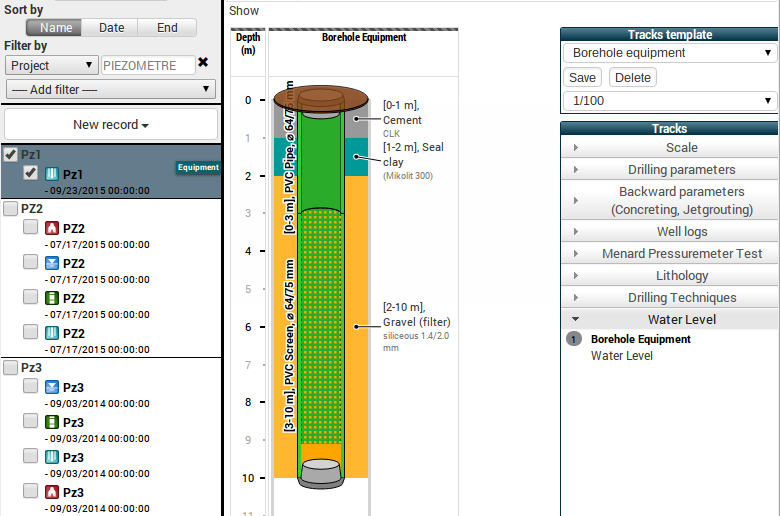
Borehole equipment
Creating a new borehole equipment
To create a new record of borehole equipment, see Creating a record.
Representing a borehole equipment
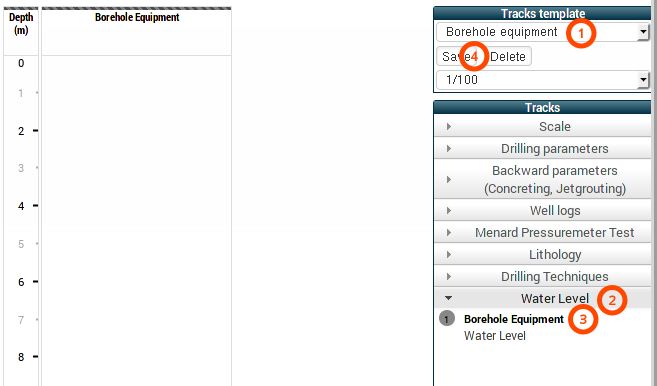
(1) Representing borehole equipment occurs in Tracks template (e.g. Borehole equipment)
(2) Open the Water Level tab of Tracks control
(3) Click ![]() to add a Borehole Equipment
track
to add a Borehole Equipment
track
(4) Save changes to the current Tracks template with Save
Entering a borehole equipment

(1) Mouse over the track header,
![]() appears.
Click to access the borehole equipment input window.
appears.
Click to access the borehole equipment input window.
Entering equipment frame
Frame describes the borehole shape.
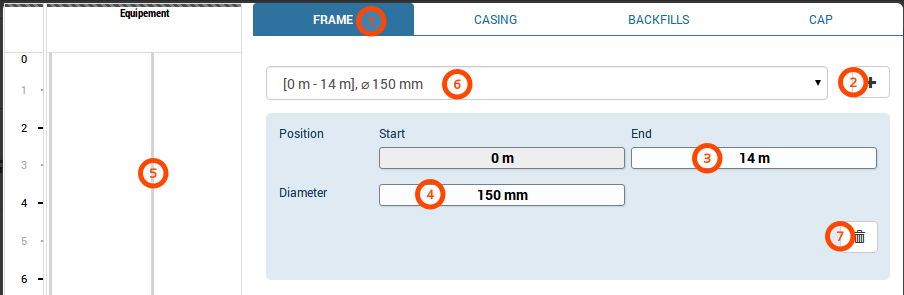
(1) Select FRAME tab
(2) Add a new frame by clicking ![]()
(3) Enter frame End Position with unit (e.g. 14 m)
(4) Enter frame Diameter with unit (e.g. 150 mm)
(5) The drawing of the frame appears in the preview
(6) The frame appears in the frame list
(7) ![]() button allows deletion of the current
frame
button allows deletion of the current
frame
Entering borehole casing
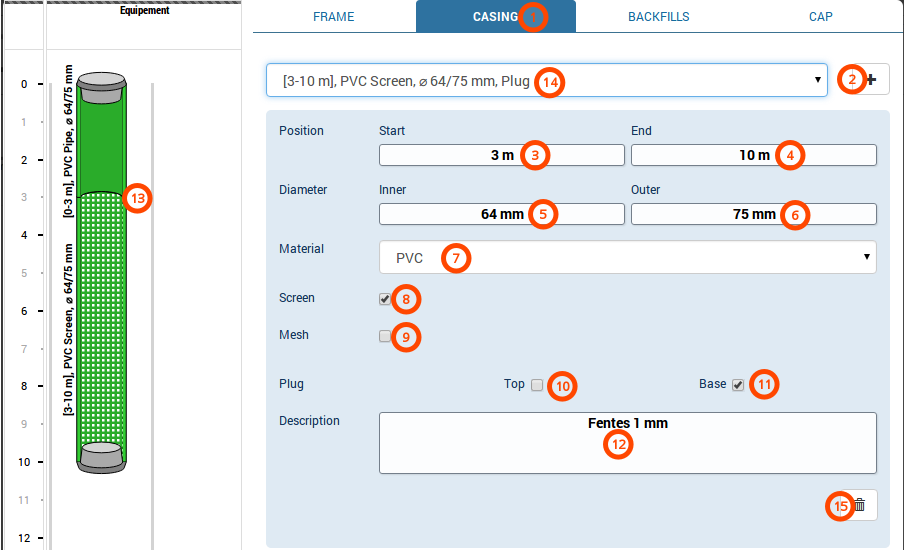
(1) Select CASING tab
(2) Add a new casing by clicking ![]()
(3) Enter casing Start Position with unit (e.g. 0 m)
(4) Enter casing End Position with unit (e.g. 3 m)
(5) Enter casing Inner Diameter with unit (e.g. 64 mm)
(6) Enter casing Outer Diameter with unit (e.g. 75 mm)
(7) Select casing Material in the list
(8) Check Screen if needed
(9) Check Mesh if casing is covered, for example with a geotextile mesh
(10) Check Plug Top if needed
(11) Check Plug Base if needed
(12) Enter a Description to add more information
(13) The drawing of the casing appears in the preview
(14) The casing appears in the casing list
(15) ![]() button allows deletion of the current
casing
button allows deletion of the current
casing
Entering backfills
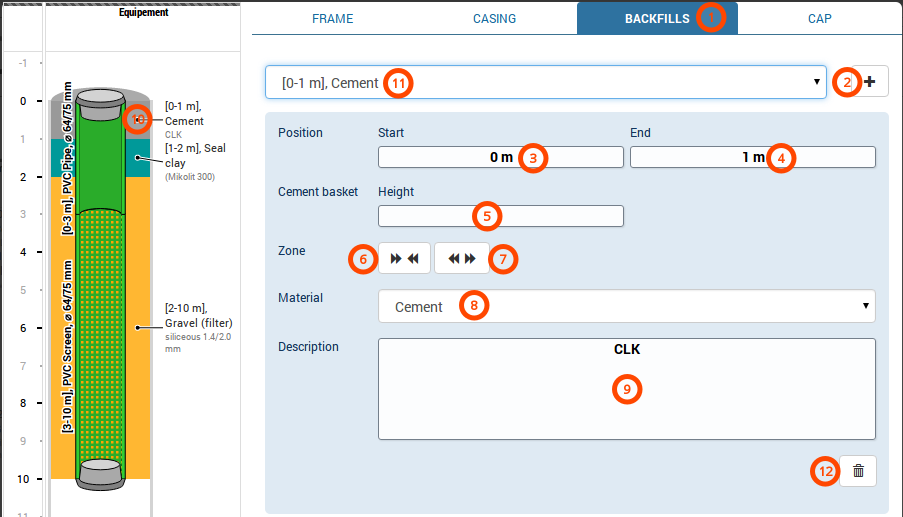
(1) Select BACKFILLS tab
(2) Add a new backfill by clicking ![]()
(3) Enter backfill Start Position with unit (e.g. 0 m)
(4) Enter backfill End Position with unit (e.g. 3 m)
(5) If a Cement basket is installed at the base of filling, enter the Height of the basket (e.g. 20 cm)
(6) If several tubes are nested, move the filling inside with
![]()
(7) If several tubes are nested, move the filling outside with
![]()
(8) Select backfill Material in the list
(9) Enter a Description to add more information
(10) The drawing of the backfill appears in the preview
(11) The backfill appears in the backfill list
(12) ![]() button allows deletion of the current
backfill
button allows deletion of the current
backfill
Entering cap
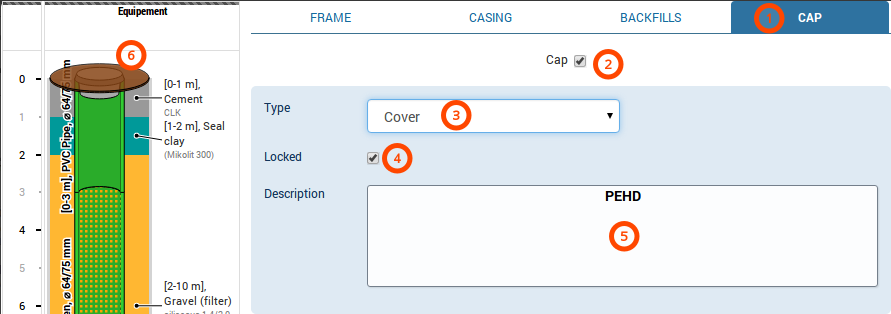
(1) Select CAP tab
(2) Check Cap (Uncheck to delete it)
(3) Select the Type in the list
(4) Check Locked if the cover is provided with a safety device
(5) Enter a Description to add more information
(6) The cap appears in the preview
Saving the borehole equipment
- The borehole equipment is automatically saved when you click outside the form.
- View the final representation of borehole equipment in the track template.