Lithology
Creating a lithology
To create a new record of lithology, see Creating a record.
Representing a lithology
![]()
(1) Representation of lithology occurs in a defined Tracks template (e.g. STRATI)
(2) Find the Lithogy group in the Tracks list
You can represent the following tracks:
(3) Depths: represents the depth of the layer boundaries
(4) Symbol: graphic symbols representing the lithology
(5) Symbol Names: represents the symbol names lithology
(6) Description: represents the textual descriptions of the layers
(7) Formation: represents the name of the geologic formation and its possible color
(8) Stage: represents the name of the stratigraphic stage and color
(9) Serie: represents the name of the stratigraphic serie and color
(10) System: represents the name of the stratigraphic system and color
(11) Erathem: represents the name of the stratigraphic erathem and color
(12) Use ![]() to add a track,
to add a track,
![]() to remove a track
to remove a track
(13) Save changes to the current model with the button Save
Entering the lithology

Place the cursor at the right end of a Lithology track header.
Click ![]()
The Lithology form allows creating a stack of successive layers of soils. Each layer may contain lithologic, geologic and stratigraphic information.
Creating a layer
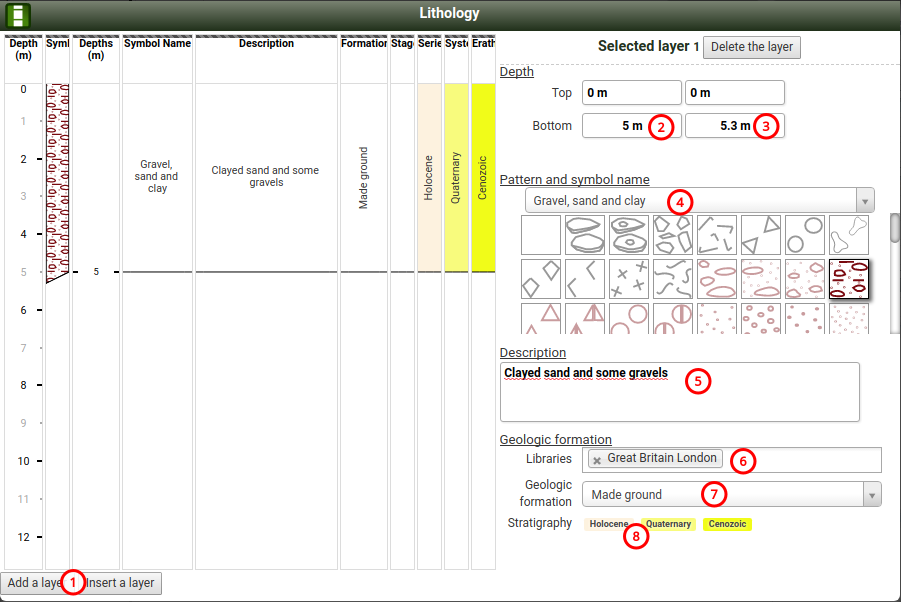
(1) Click Add a layer: an empty layer with a default thickness is displayed in the preview
(2) Depth Bottom: Specify the lower layer in the first box (e.g. 5 m)
(3) If the boundary layer is sharp, leave the same value in the second box as is (e.g. 5 m). If the boundary layer is blurred or progressive, enter another value in the second box (e.g. 5.3 m)
(4) Pattern and symbol name: Choose the symbol of lithology, by name by searching the list (e.g. Gravel, sand and clay), or by browsing the images tile
Note: If a symbol is missing, please contact us
(5) Description: Enter the layer description
Geologic formation
(6) Select the Library corresponding to your region (several libraries can be attached)
(7) Choose the Geologic formation
Note: If your region is not represented, or a geologic formation is missing, please contact us
(8) The Stratigraphy is automatically extracted from the formation if it has been provided in the library
Editing a layer
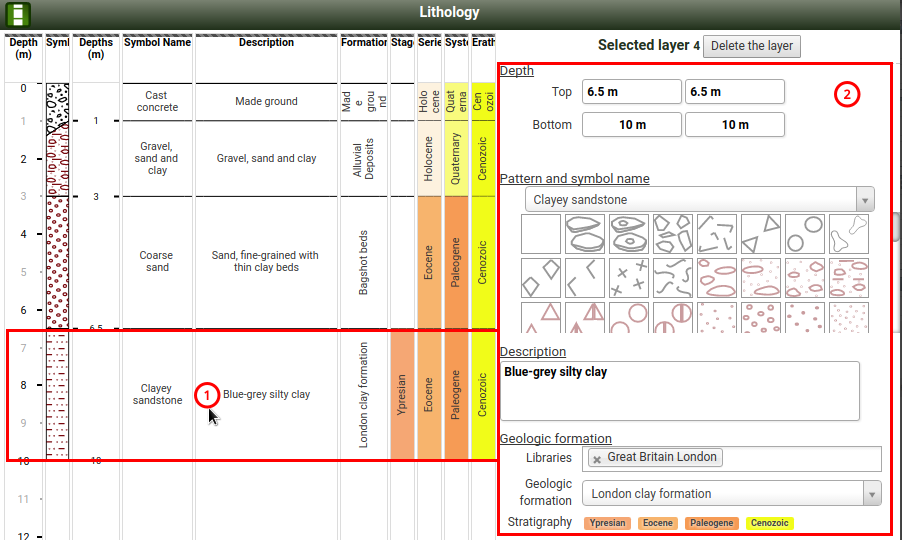
(1) Click the layer to change
(2) Change the incorrect information
Inserting a layer
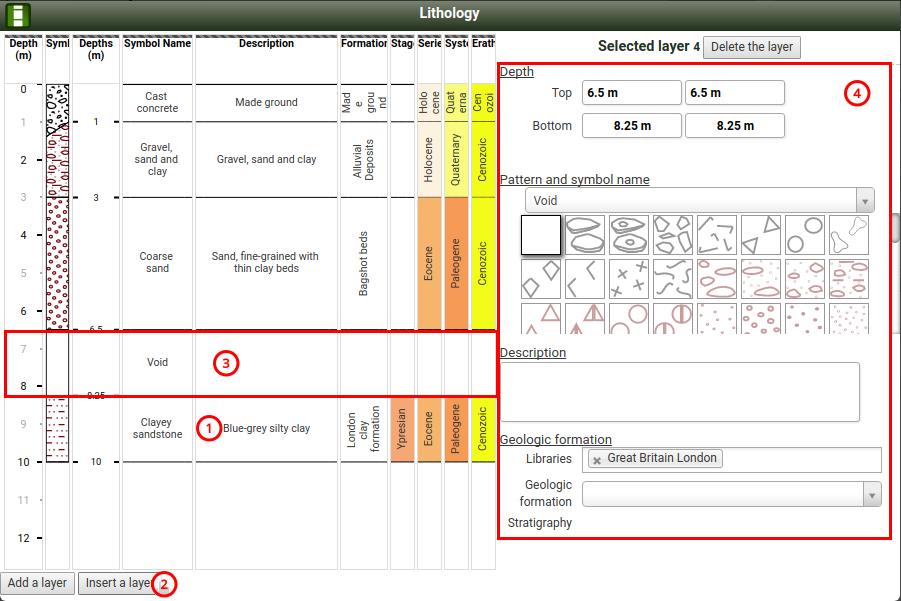
(1) Select the layer above which you want to insert a new layer
(2) Click Insert a layer
(3) A new layer is inserted into the upper half of the initial layer
(4) Enter information of the inserted layer
Deleting a layer

(1) Click the layer to remove
(2) Click Delete the layer
Saving the lithology
The lithology is automatically saved when you click outside of the form.